
How to add images to a Shopify blog post: image with text, gallery, slider, banner and before/after
How to add images to a Shopify blog post: image with text, gallery, slider, banner and before/after
3 min read
You can add images to a Shopify blog post in five layouts with vevy.ai: an image with text section, an image gallery, an image slider, a banner and a before and after comparison. To add one, drag the element into your post in the blog builder, upload your images and fill in the settings on the right. You don’t need any code or theme edits.
Shopify’s own blog editor puts every image in one column, one under the other. It has no way to place an image next to text, show a gallery or add a slider inside an article. vevy adds these layouts as drag-and-drop elements, so every blog post can look like a designed page instead of a long wall of text.
This guide shows how to add each image layout, what you can change in each one, and how to prepare your images so they look sharp, load fast and help your posts rank in search.
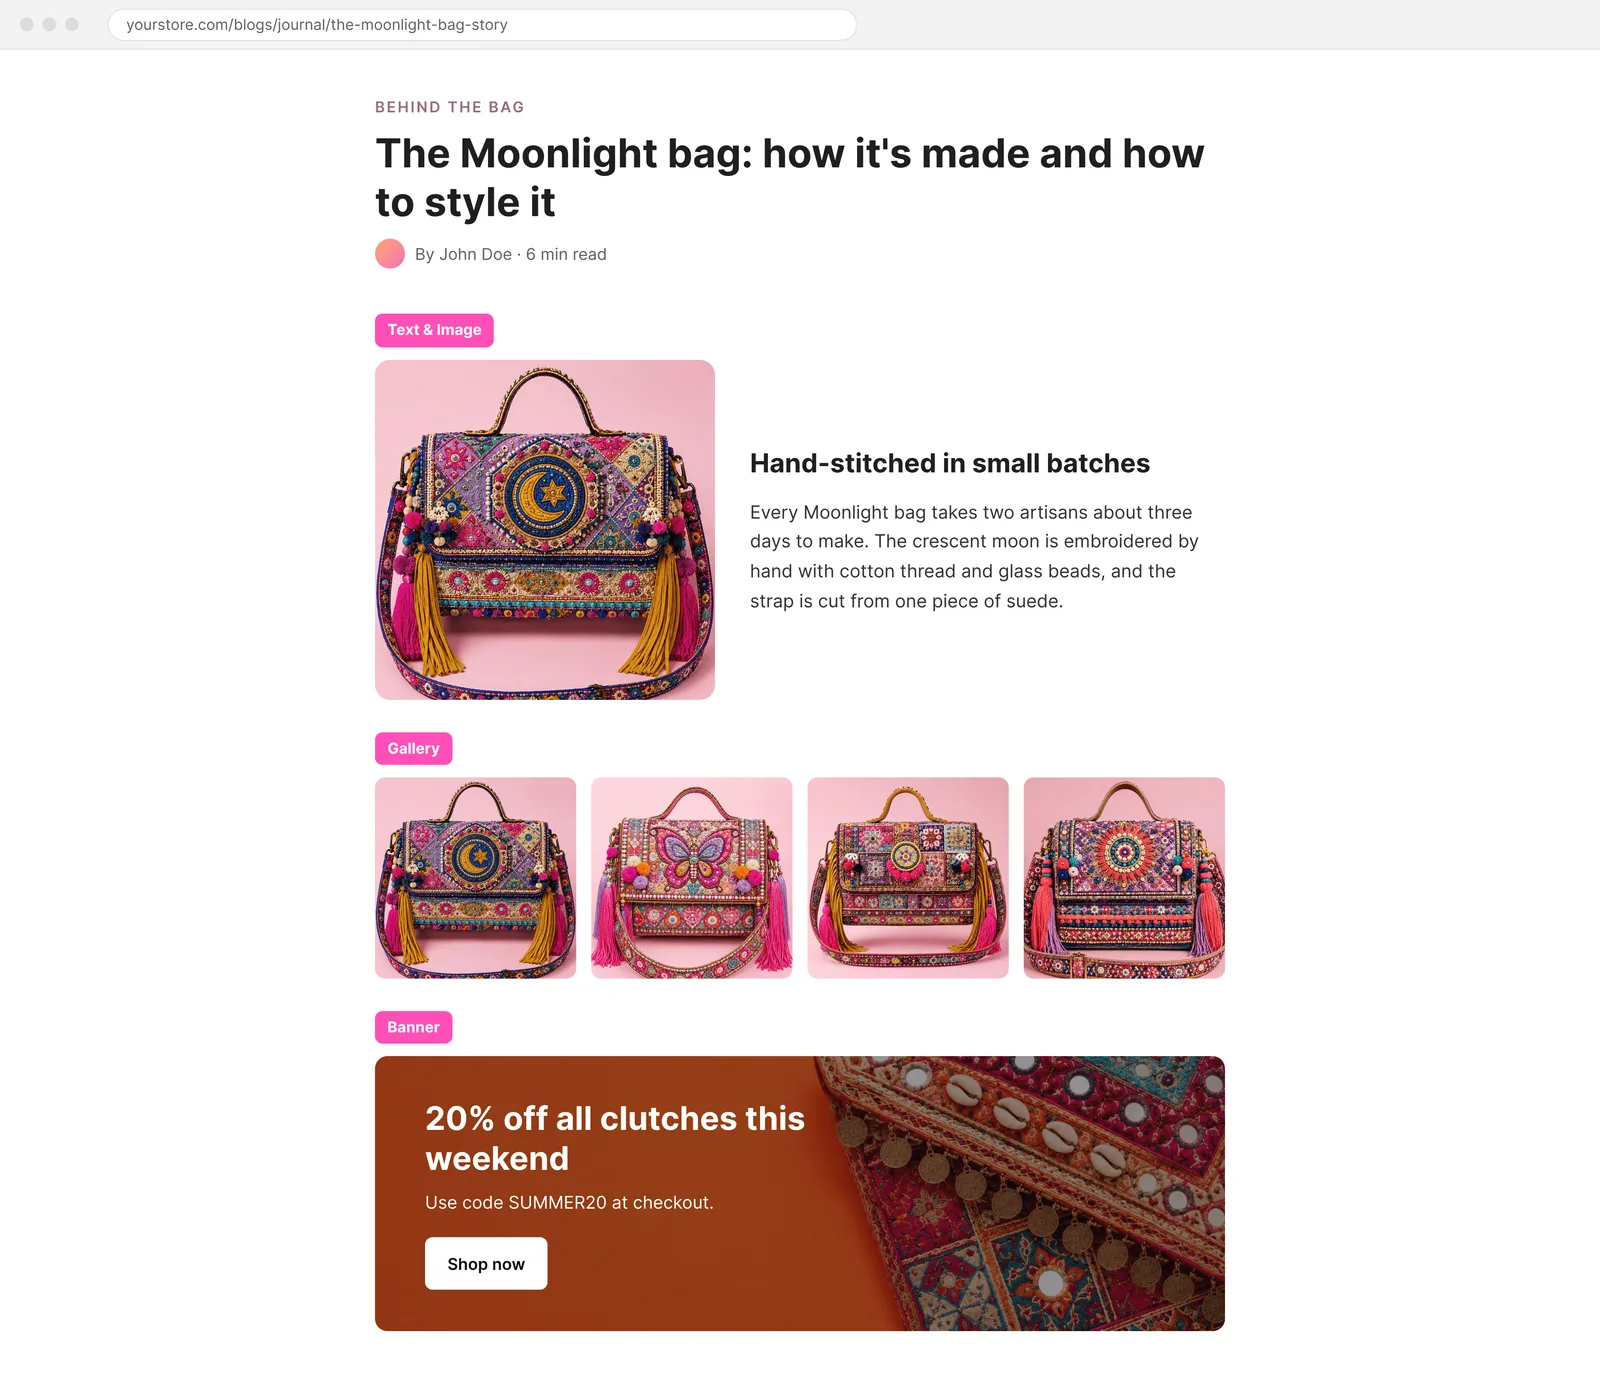
Which image layout should you use?
The right image layout depends on how many images you have and what you want readers to do with them. Each element shows images in a different way.
| Element | What it shows | Best for | Plan |
|---|---|---|---|
| Text & Image | One image beside a title and text, left or right | Explaining a product, a step or an idea with a picture | All plans |
| Gallery | A grid of 2 to 4 images per row, with an optional lightbox | Lookbooks, collections, event photos and step-by-step results | Starter and Pro |
| Slider | Images that slide one after another, each with a title, subtitle and button | Offers, featured collections and short visual stories | Starter and Pro |
| Banner | One wide image with a title, subtitle and button on top | Promotions and calls to action inside a post | Starter and Pro |
| Before/After | Two images behind a slider that readers drag to compare | Results, makeovers, restorations and photo edits | All plans |
Before you start
To add images to a post you wrote in Shopify’s own blog editor, sync the post into vevy first. Open vevy from the Apps menu in your Shopify admin and click Sync Shopify posts on the dashboard. Your existing posts then show in the Blog Planner, and you can open any of them in the blog builder.
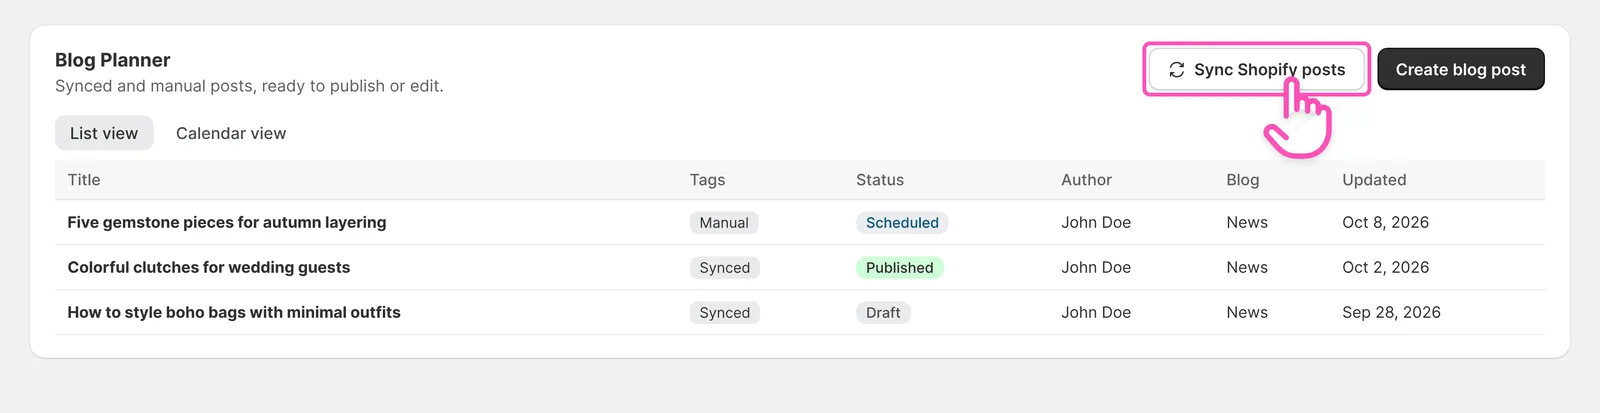
To find the image elements, open a post in the blog builder and look in the Elements panel. Text & Image and Before/After are in the Layout group, which is on every plan. Gallery, Slider and Banner are in the Media & Marketing group, which is on the Starter and Pro plans.
Every image element accepts JPG, PNG, GIF, WebP and SVG files. You can upload a new image from your computer or pick one you already uploaded from your Library.
How to add an image with text section to a Shopify blog post?
To add an image with text section to a Shopify blog post, drag the Text & Image element into the post, upload your image and write a title and text next to it. The image and the text then sit side by side in your article, with the image on the left or the right.
This is the same “image with text” layout you know from Shopify theme sections, but you can use it inside any blog post, as many times as you want. Each one has its own image and text, so you can build a whole article from image and text sections.
-
Open your blog post in the blog builder.
-
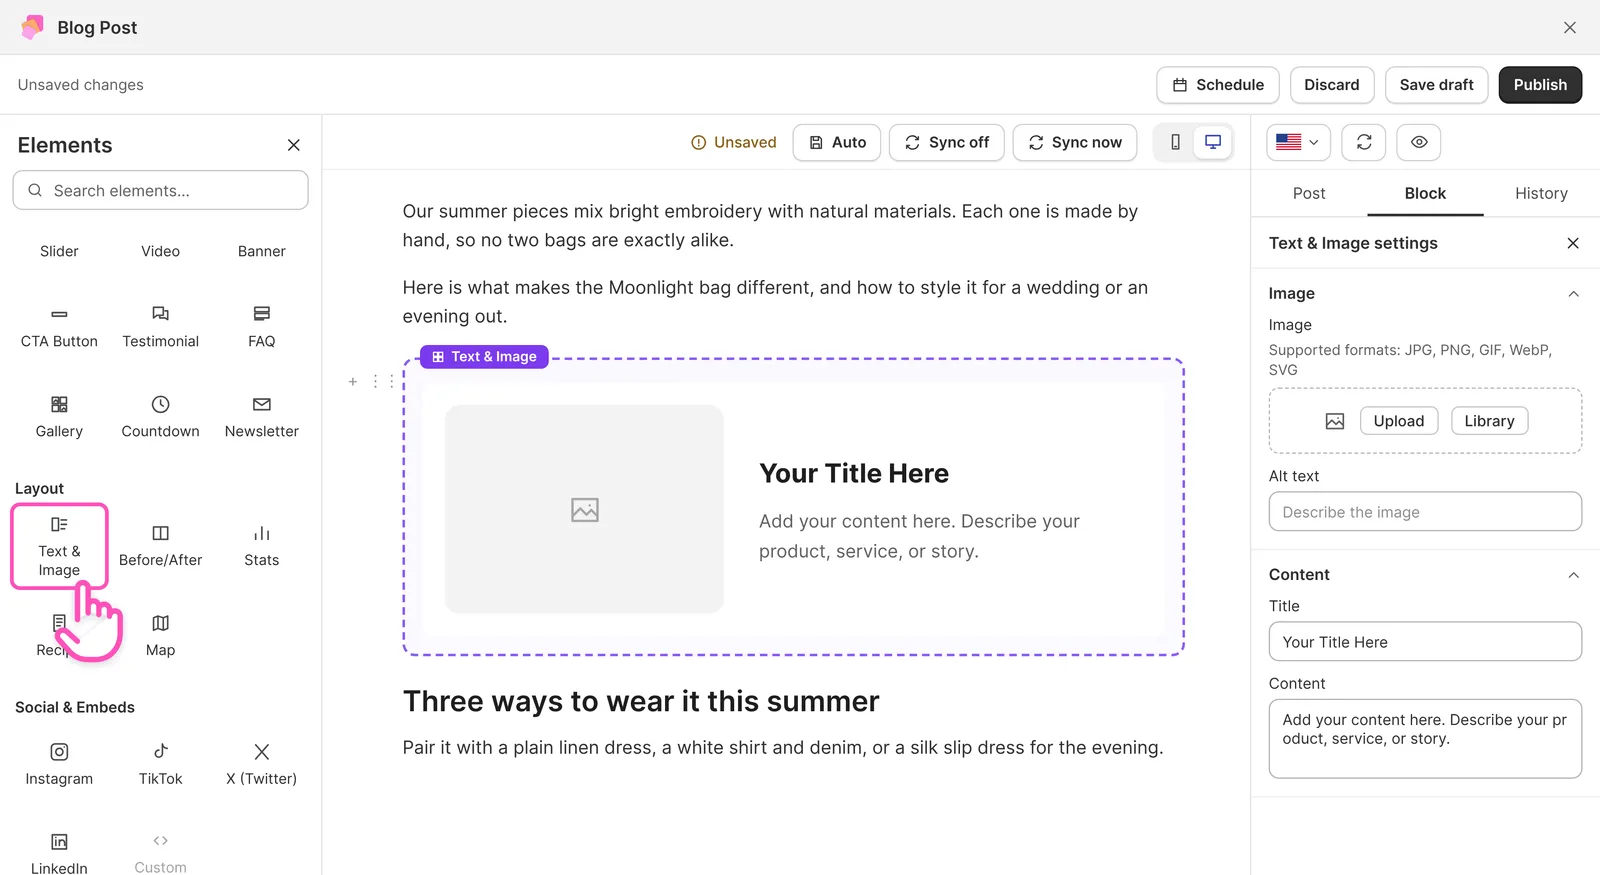
In the Elements panel, open the Layout group and find Text & Image.
-
Drag the Text & Image element into your post, where you want the section to show.
-
Click the element to open its settings in the Block tab on the right.
-
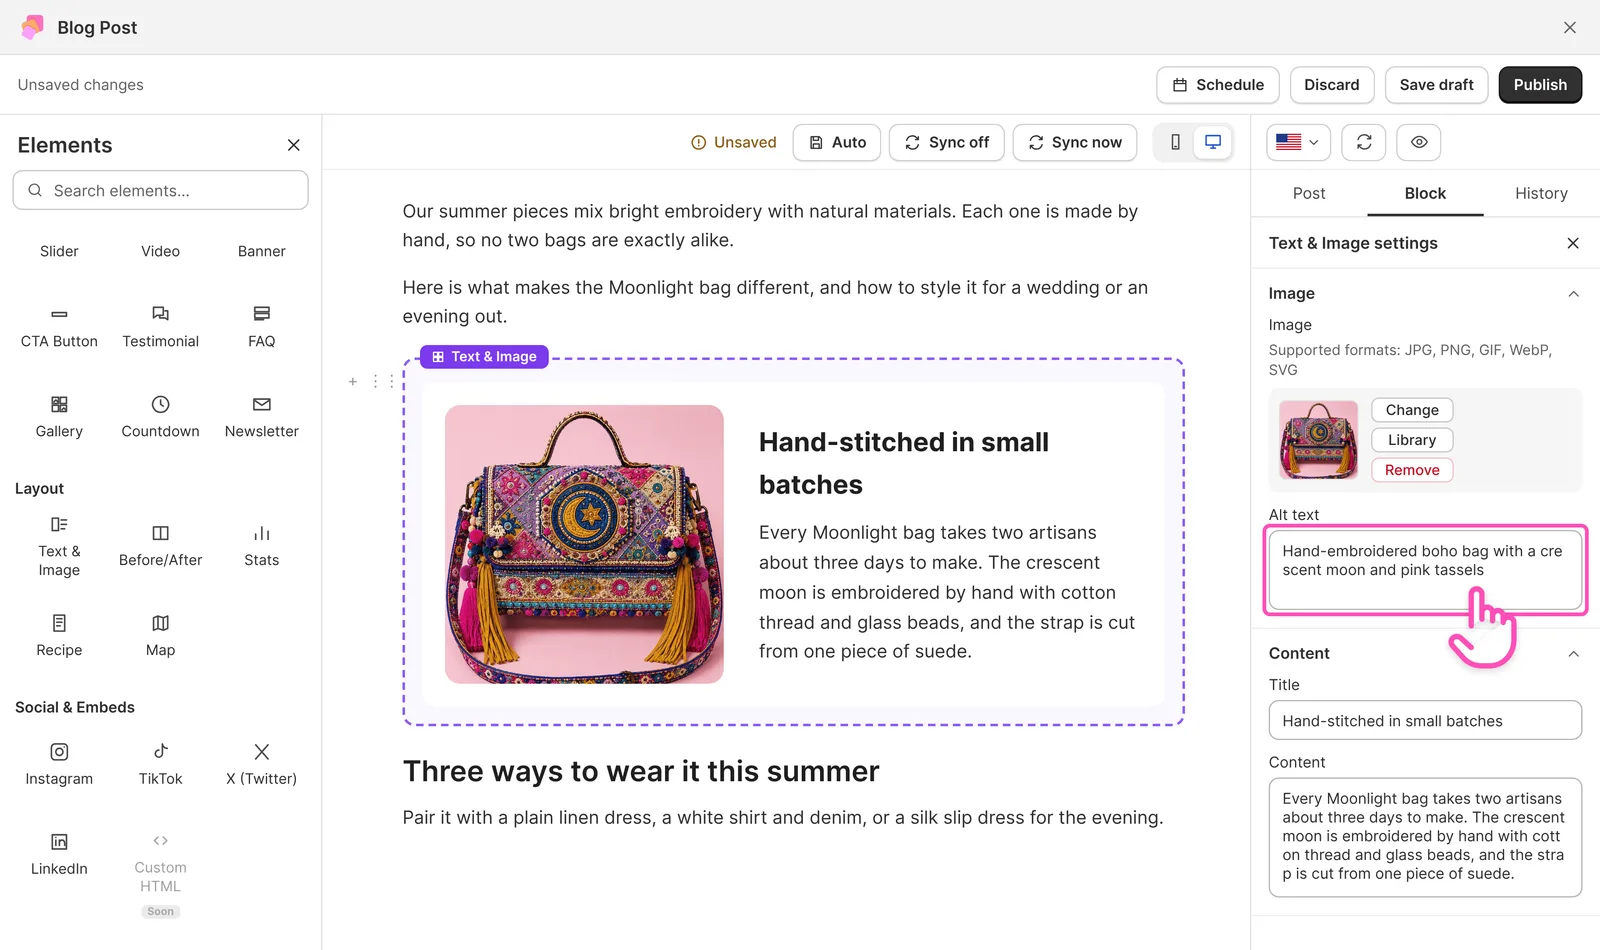
Click Upload or Library to add your image, then write a short Alt text that describes it.
-
Write a Title and the Content that goes next to the image.
-
Set the image position, the image width and the spacing.
-
Click Save draft or Publish.
Text & Image settings you can change
The Text & Image element has these settings:
- Image: upload a new image, pick one from your Library, change it or remove it.
- Alt text: a short description of the image for search engines and screen readers.
- Title and Content: the heading and the text next to the image. The text side also accepts headings and lists.
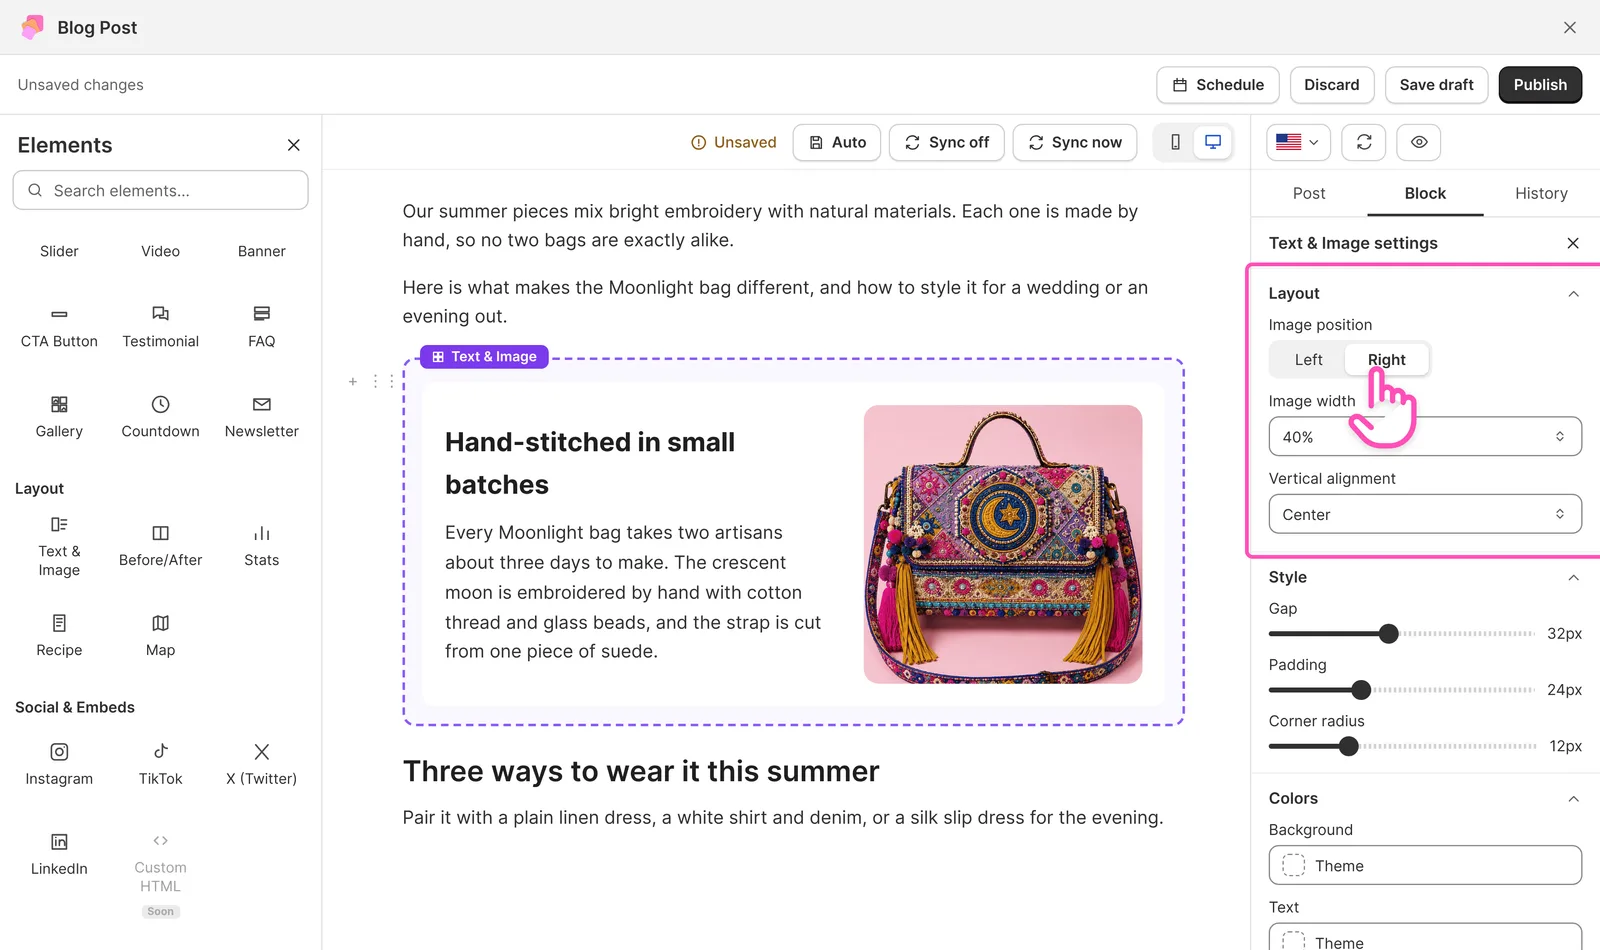
- Image position: the image on the left and the text on the right, or the other way around.
- Image width: how much of the section the image takes.
- Vertical alignment: the text at the top, center or bottom, next to the image.
- Gap, padding and corner radius: the space between the image and the text, the space inside the section and how round the corners are.
- Colors: the background color and the text color of the section.
How to put the image on the right and the text on the left
To put the image on the right side of the text, open the Text & Image settings and set Image position to Right. To alternate sides down a long post, set the first section to Left, the next to Right, and so on. Readers move through an alternating layout more easily than a column of images on the same side.
Does the image with text section work on mobile?
Yes. On phones, the image and the text stack, with the image above the text, so the section stays easy to read on a small screen. Use the phone icon above the canvas in the blog builder to check it before you publish.
Text & Image, Text & Product or sections?
The three ways to place content next to text each fit a different need:
- Text & Image places one image next to your text. It’s on every plan.
- Text & Product places a product with its price and a buy button next to your text. It’s in the E-commerce group, on the Starter and Pro plans. See How to add products to a Shopify blog post.
- Sections let you place several elements, like an image, a video and a product, next to longer text, with the Media left, Media right or Alternating layout. Sections are on the Pro plan. See Sections and layouts.
How to add an image gallery to a Shopify blog post
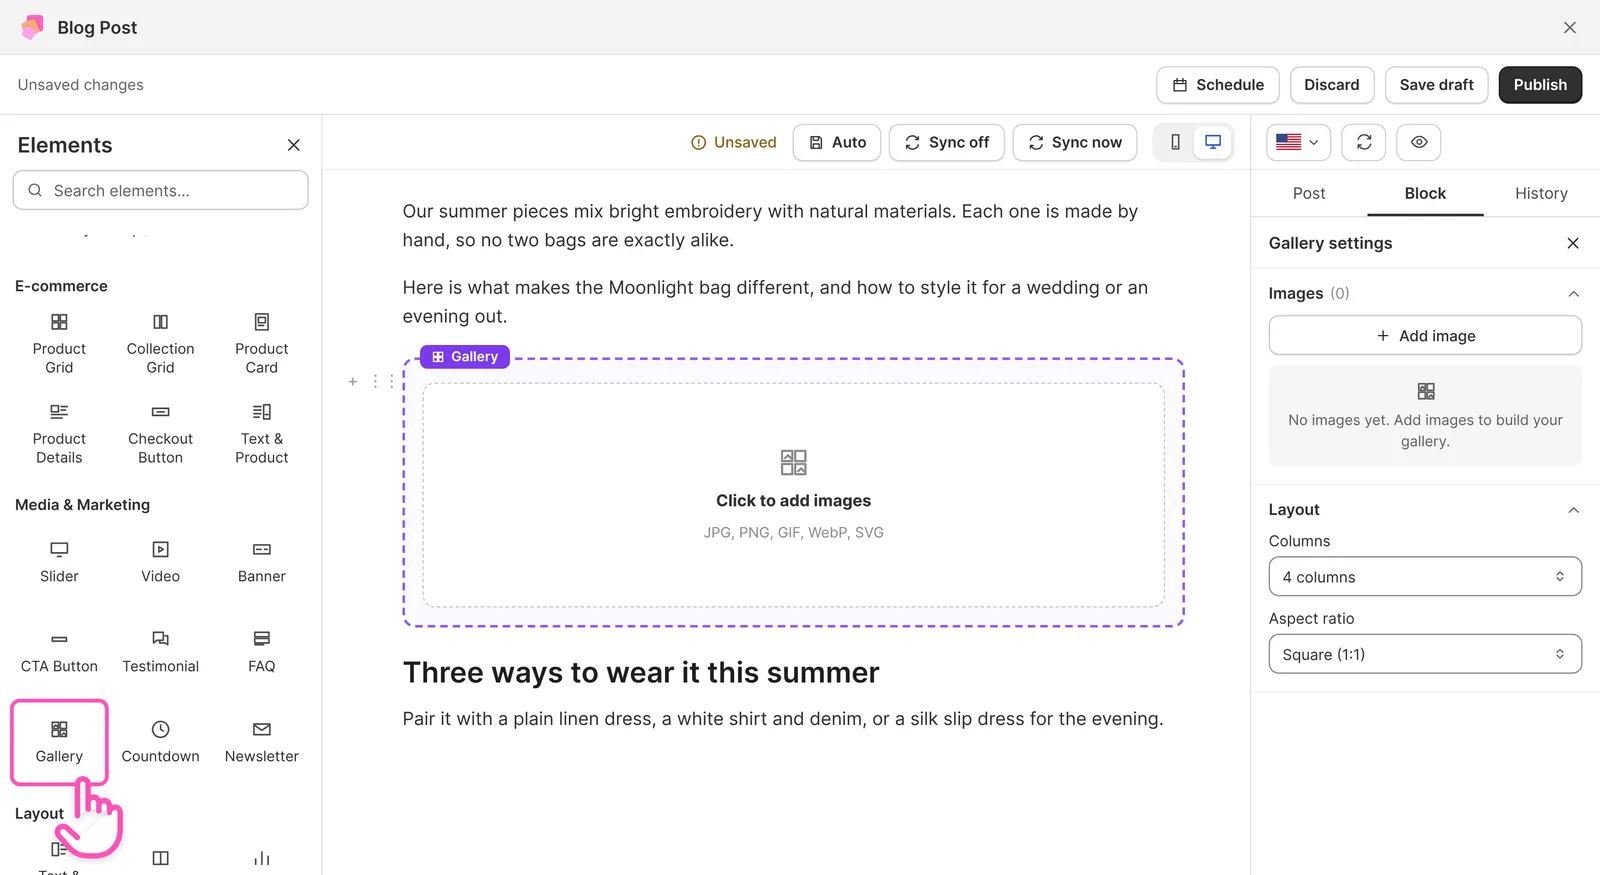
To add an image gallery to a Shopify blog post, drag the Gallery element into the post and upload your images. The images then show in a clean grid, and you can let readers click any image to see it full size in a lightbox.
-
Open your blog post in the blog builder.
-
In the Elements panel, open the Media & Marketing group and find Gallery.
-
Drag the Gallery element into your post.
-
Click Click to add images in the gallery, or open Gallery settings in the Block tab and click Add image.
-
Upload your images or pick them from your Library.
-
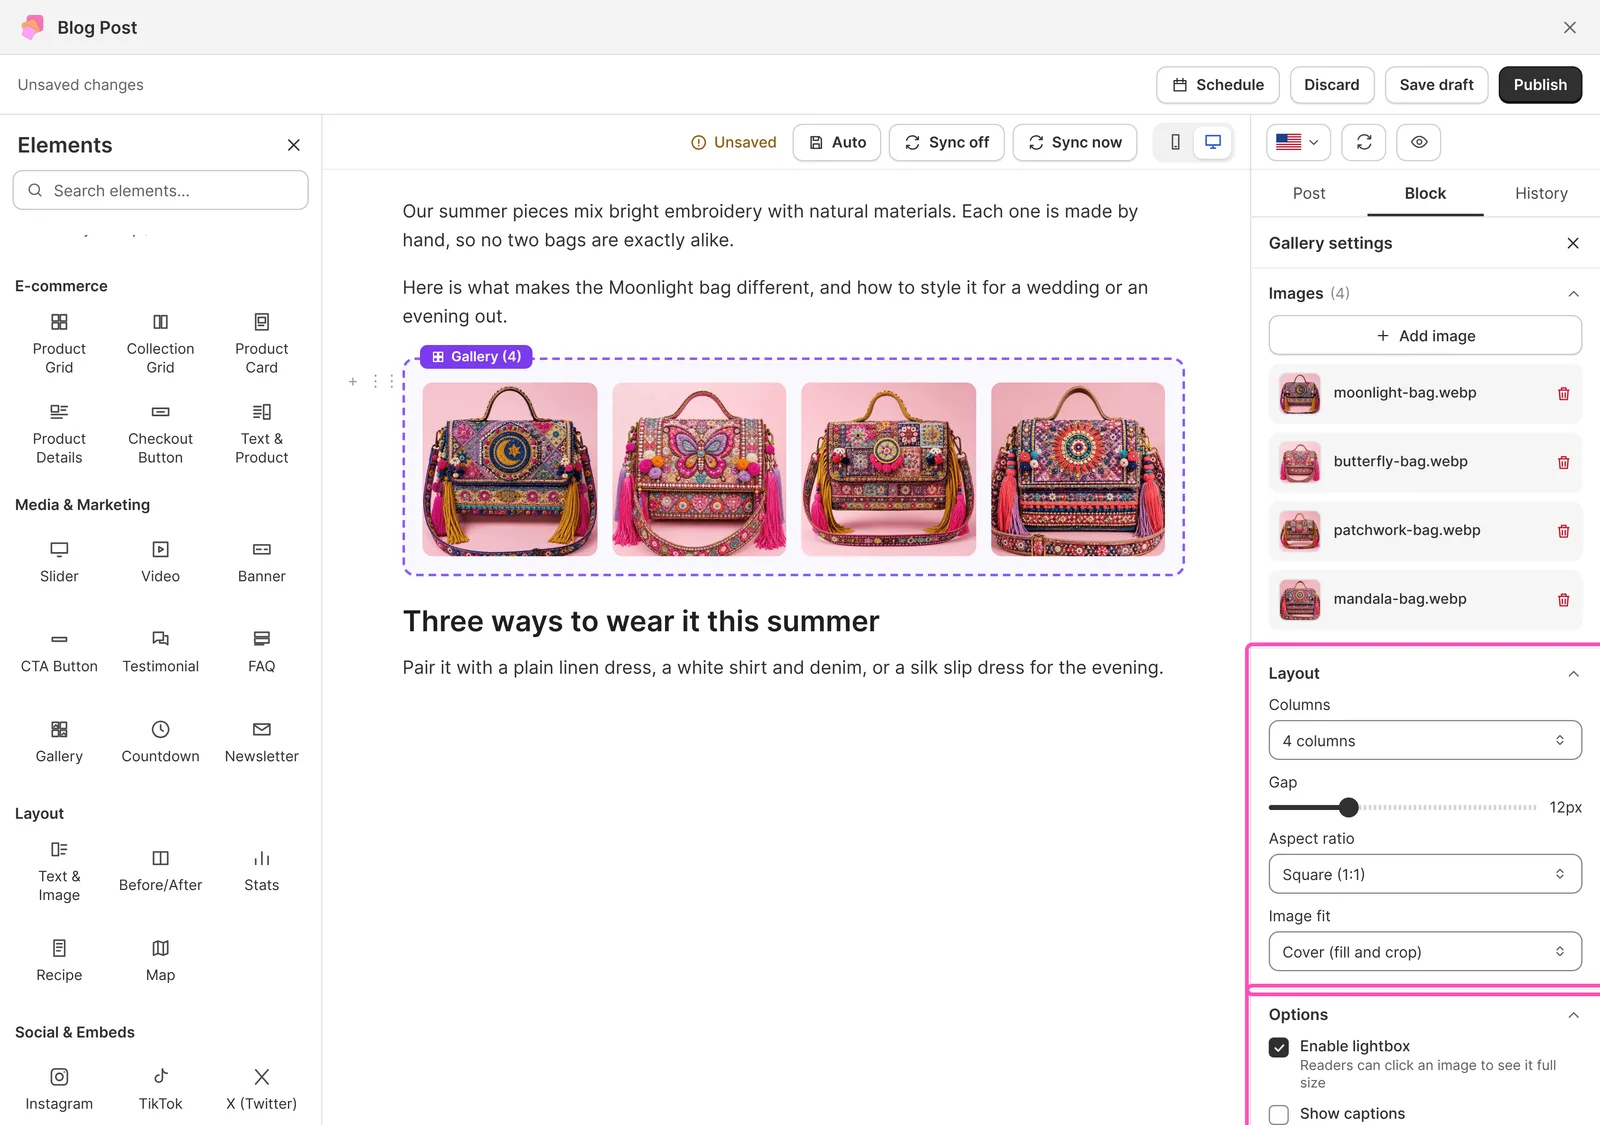
Under Layout, set the number of Columns, the Gap between images, the Aspect ratio and the Image fit.
-
Under Options, turn on Enable lightbox and Show captions if you want them.
-
Click Save draft or Publish.
Gallery settings you can change
- Columns: 2, 3 or 4 images per row.
- Gap: the space between images.
- Aspect ratio: square, landscape, portrait or the original shape of each image.
- Image fit: Cover fills the frame and crops the edges. Contain shows the whole image.
- Lightbox: readers click an image to open it full size.
- Captions: a line of text under each image.
How to add an image slider to a Shopify blog post?
To add an image slider to a Shopify blog post, drag the Slider element into the post and add one slide for each image. Each slide can have its own title, subtitle and button, so the slider works like a small carousel of offers, looks or steps inside your article.
A slider is also called a slideshow or an image carousel. Unlike a gallery, it shows one image at a time, so it saves space in the post and gives each image its own message and link.
-
Open your blog post in the blog builder.
-
In the Elements panel, open the Media & Marketing group and find Slider.
-
Drag the Slider element into your post.
-
Click the element to open Slider settings in the Block tab.
-
Choose an Aspect ratio. 16:9 (Widescreen) works for most posts.
-
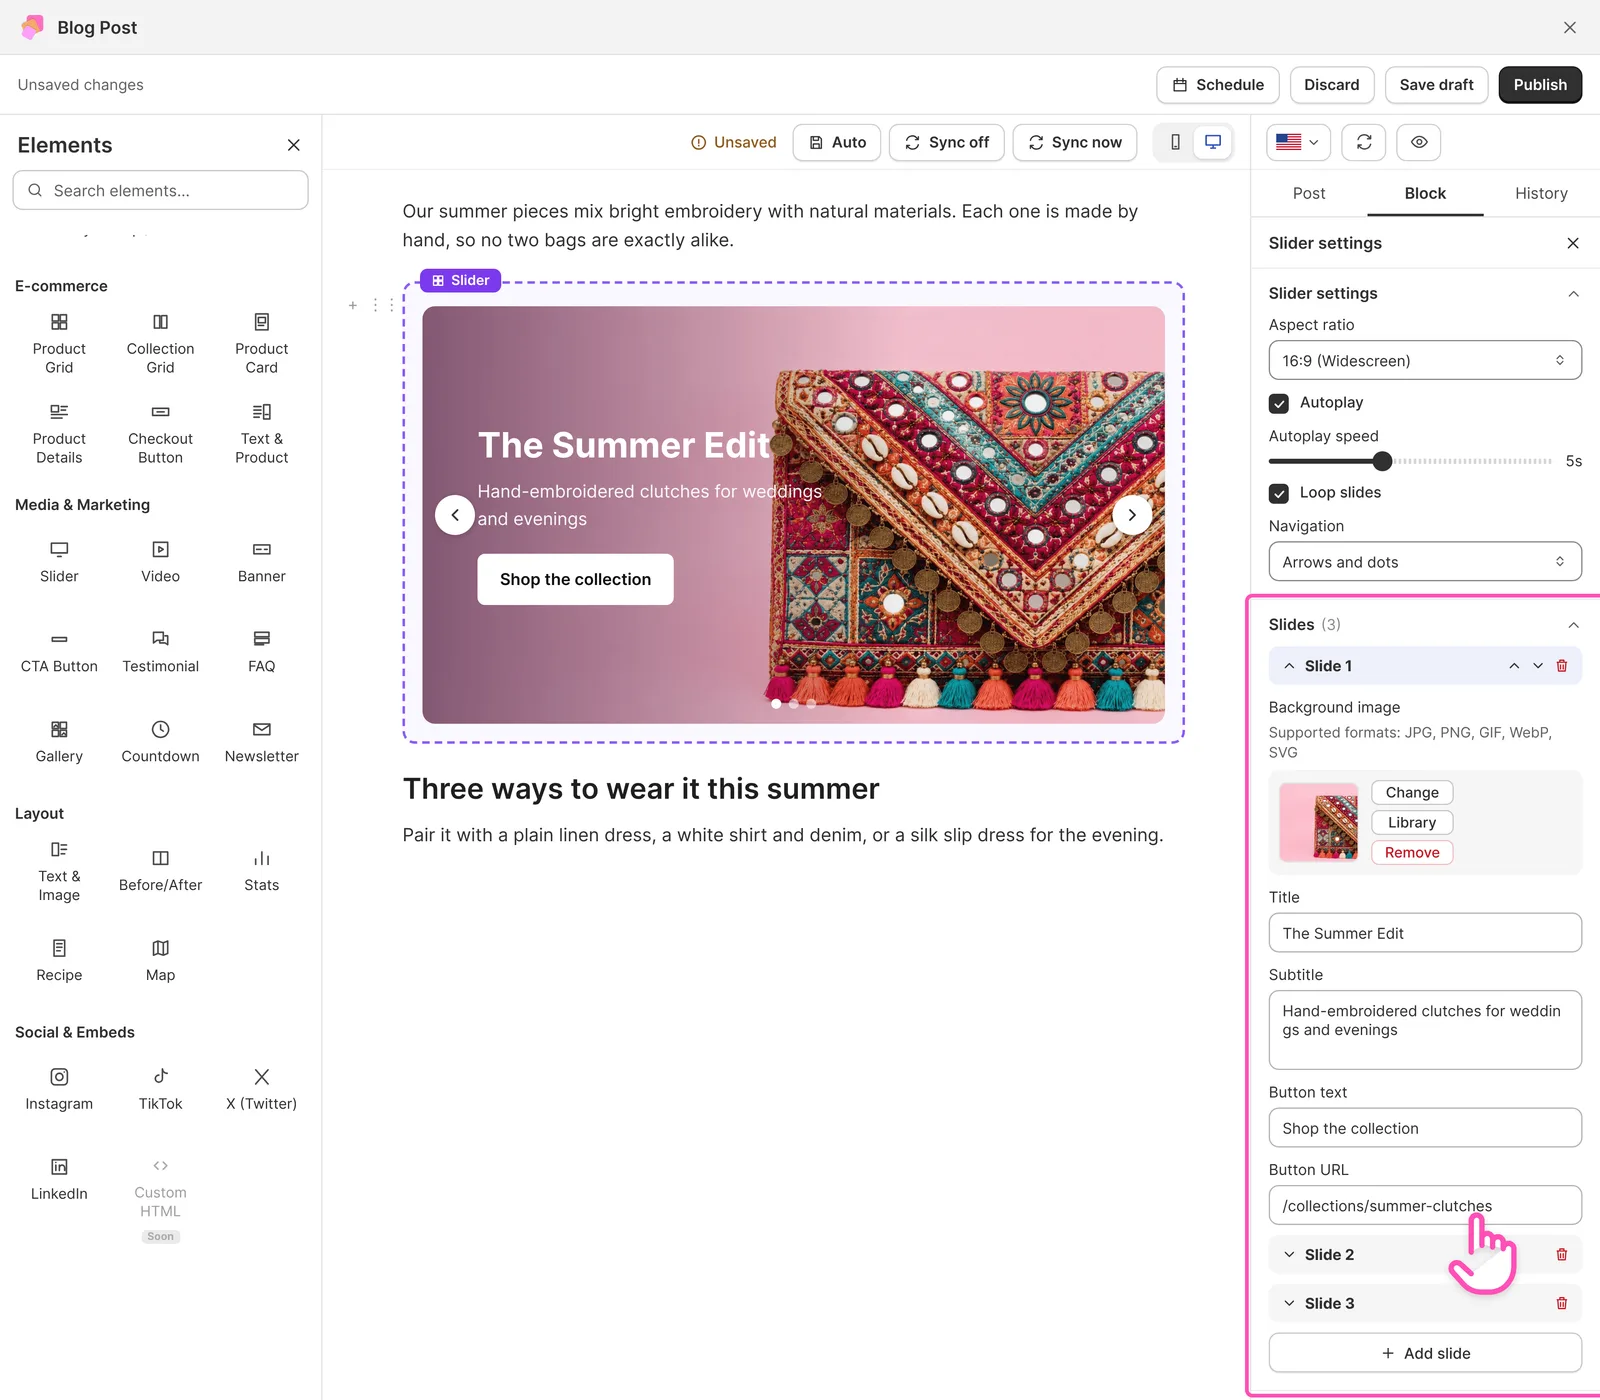
Set up the first slide: add a Background image, then fill in the Title, Subtitle, Button text and Button URL, for example
/collections/all. -
Click Add slide for each new slide. Use the arrows to change the order, or the trash icon to delete a slide.
-
Turn Autoplay on or off and set the Autoplay speed, then click Save draft or Publish.
Slider settings you can change
- Aspect ratio: widescreen, square and other ratios.
- Autoplay and speed: slides move on their own at the pace you choose.
- Loop slides: the slider starts again from the first slide after the last one.
- Navigation: show arrows, dots, both or neither.
- Slide content: a background image, title, subtitle, button text and button URL for every slide.
- Alignment and overlay: the position of the text, and a dark layer over the image so the text stays readable.
- Content area: a background panel behind the text, and the colors of the text, button and button text.
How to add a banner to a Shopify blog post?
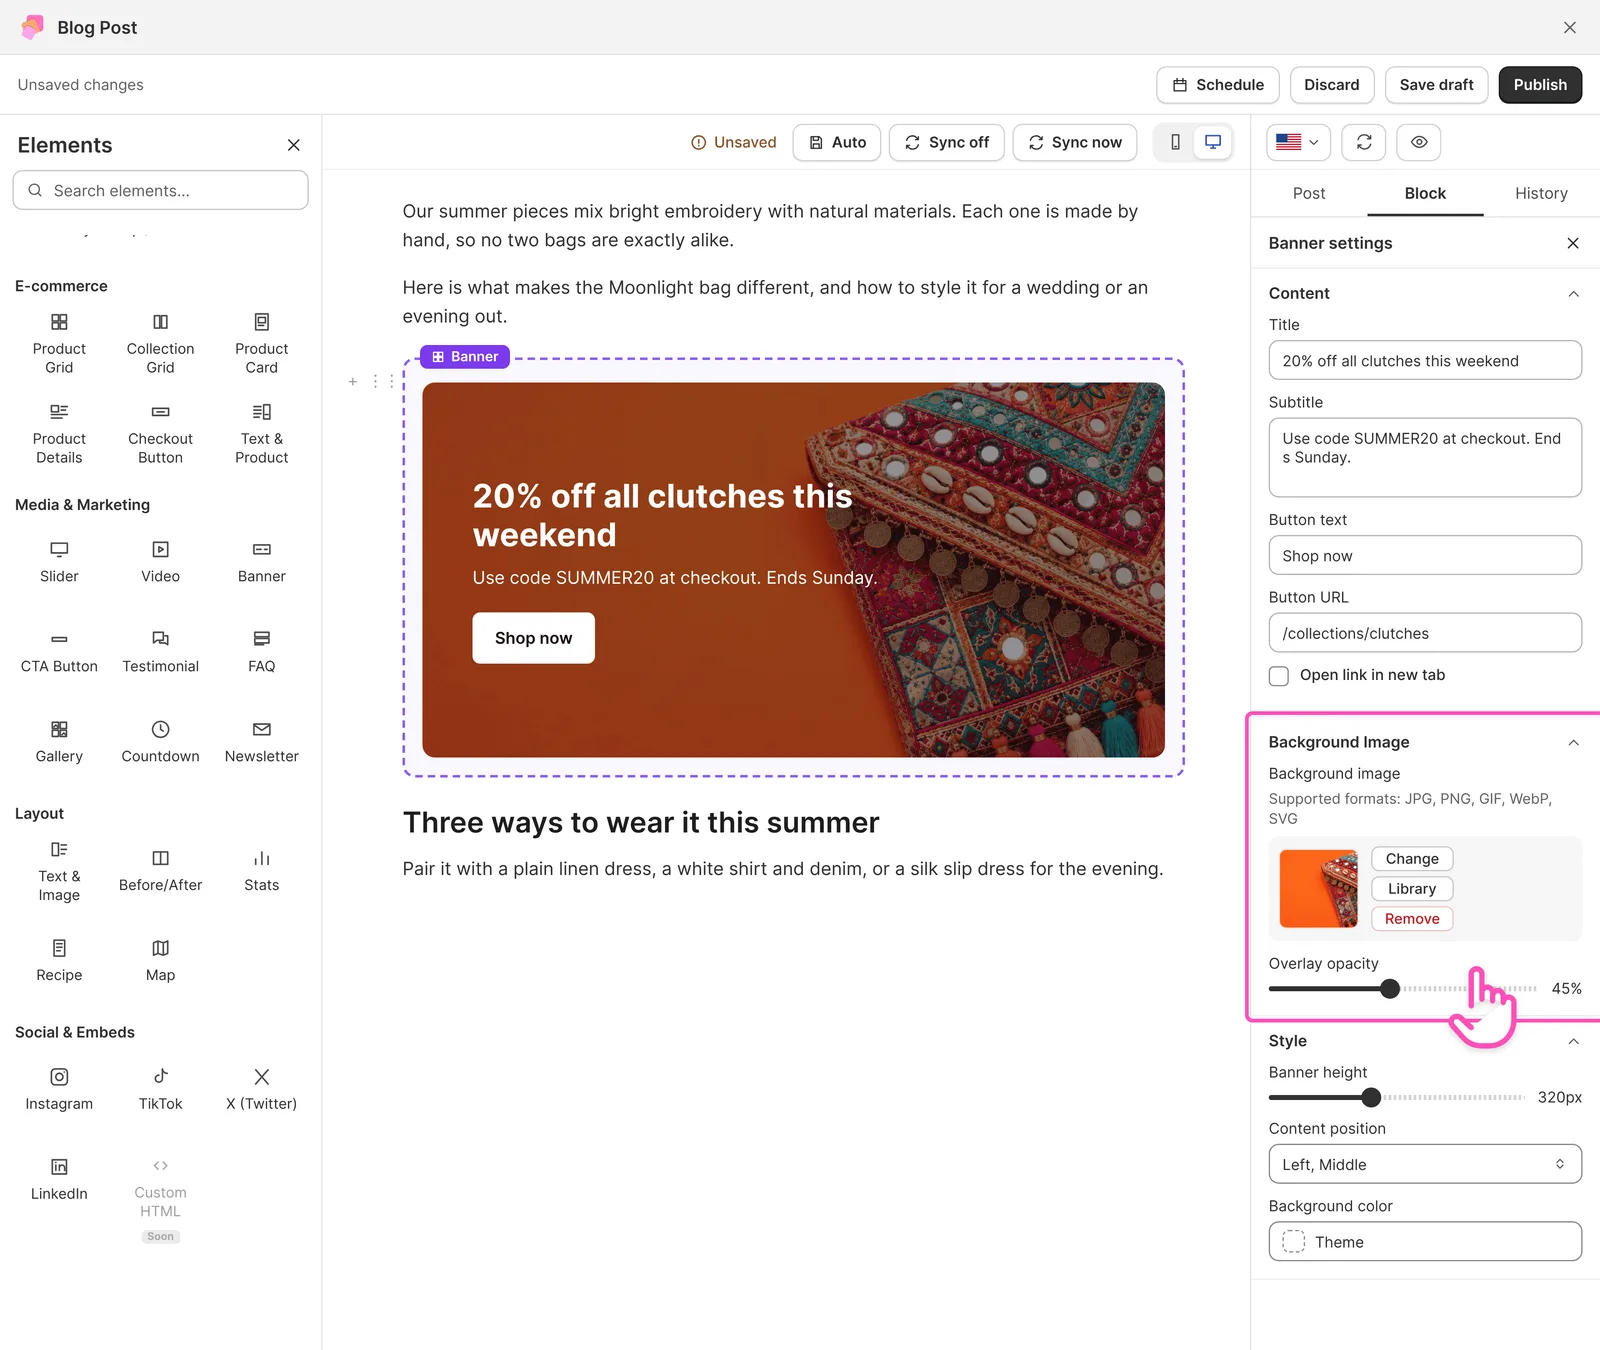
To add a banner to a Shopify blog post, drag the Banner element into the post, upload a background image and write a title, subtitle and button. The banner then shows across the full width of the article, so it stands out from the text around it.
A banner works best for a promotion or a call to action, like a seasonal sale or a link to a new collection, because it breaks the reading flow on purpose.
-
Open your blog post in the blog builder.
-
In the Elements panel, open the Media & Marketing group and find Banner.
-
Drag the Banner element into your post.
-
Click the element to open Banner settings in the Block tab.
-
Under Content, fill in the Title, Subtitle, Button text and Button URL, for example
/collections/all. Tick Open link in new tab if you want it. -
Under Background Image, click Upload or pick an image from your Library, then set the Overlay opacity so the text stays readable.
-
Under Style, set the Banner height, the Content position and the Background color.
-
Click Save draft or Publish.
Banner settings you can change
- Content: title, subtitle, button text, button URL, and whether the link opens in a new tab.
- Background image: upload a new image or reuse one from your Library.
- Overlay opacity: a darker image so light text reads clearly on top of it.
- Banner height: from a slim strip to a tall hero.
- Content position: left, center or right, and top, middle or bottom.
- Colors: the background color, and the text, button and button text colors.
How to add a before and after image slider to a Shopify blog post?
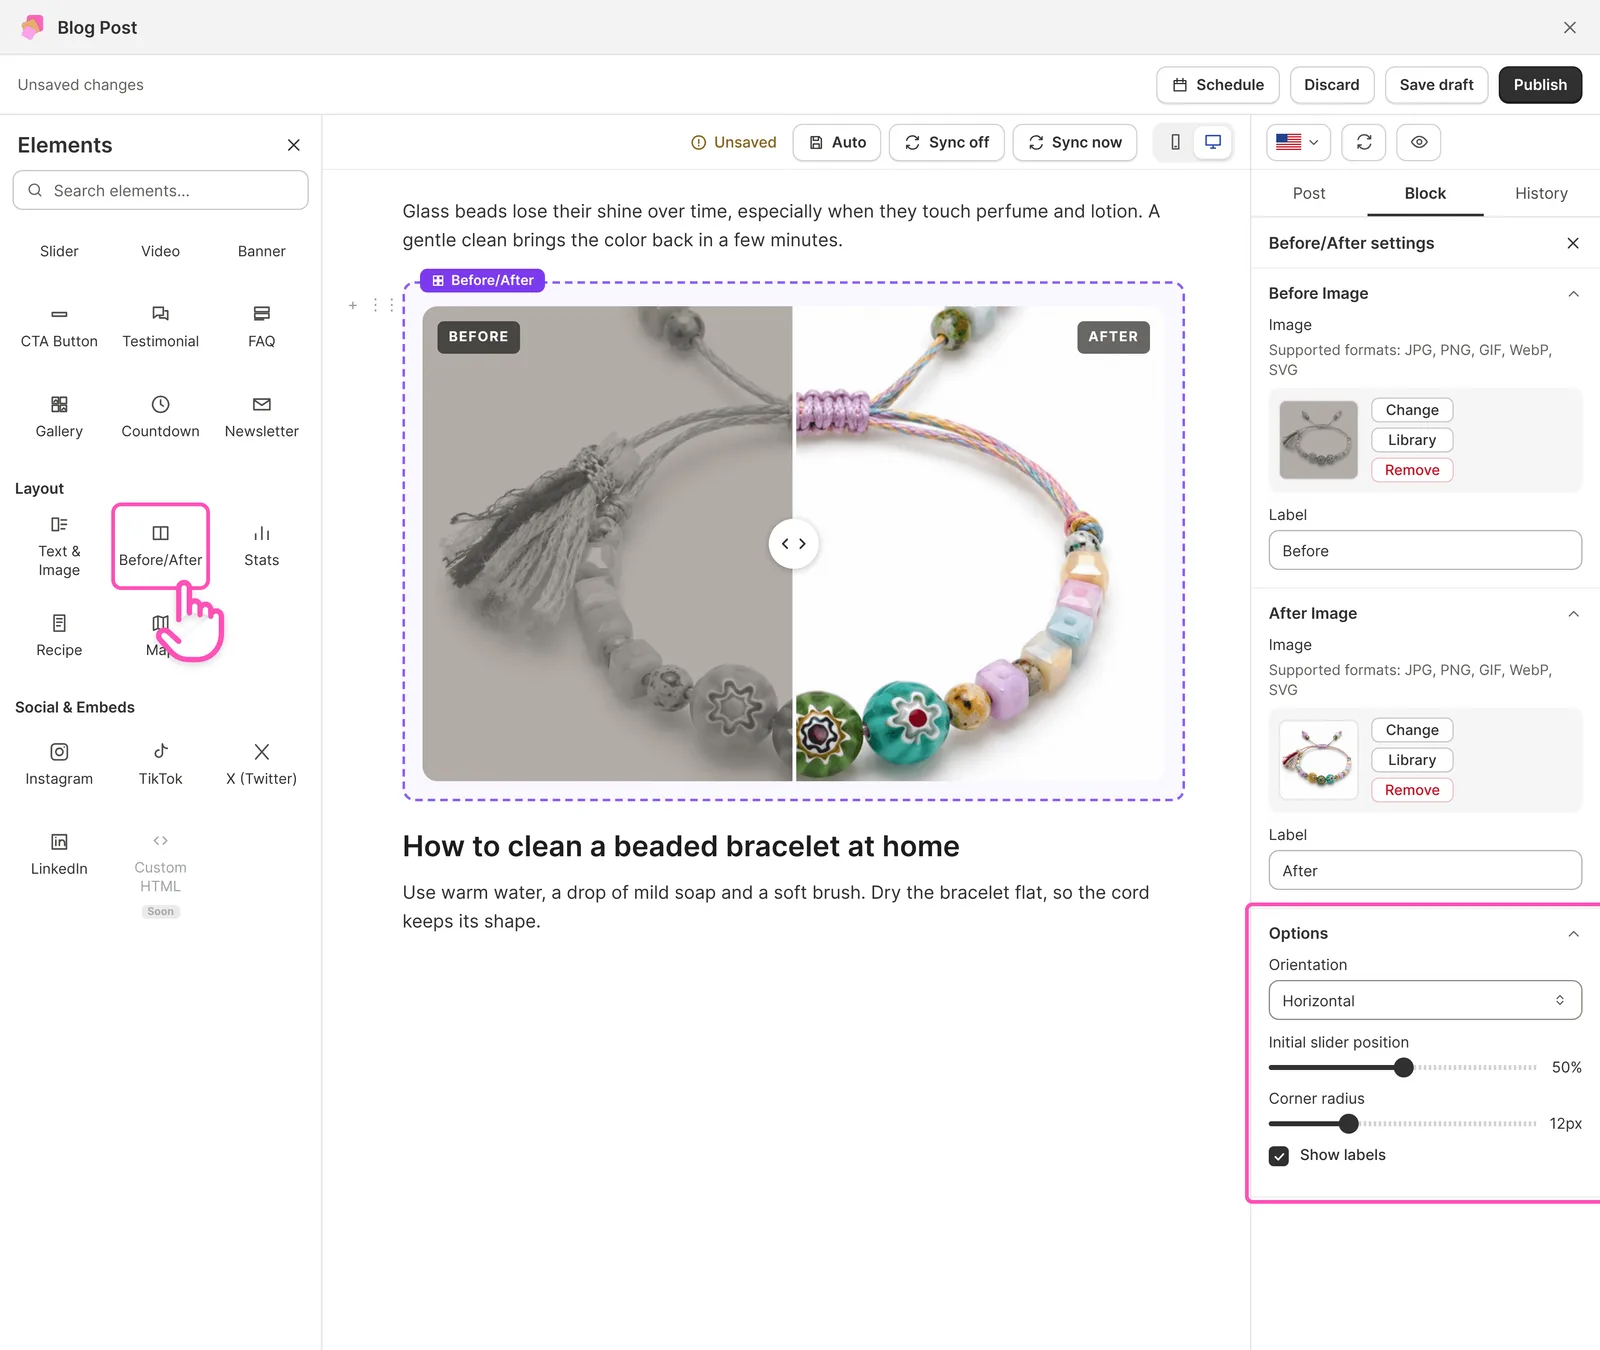
To add a before and after image comparison to a Shopify blog post, drag the Before/After element into the post and upload a before image and an after image. Readers then drag a slider across the images to compare them, which shows a change much more clearly than two separate photos.
The before and after slider is great for product results, makeovers, cleaning and restoration, renovations and photo edits.
-
Open your blog post in the blog builder.
-
In the Elements panel, open the Layout group and find Before/After.
-
Drag the Before/After element into your post.
-
Click the element to open its settings in the Block tab.
-
Under Before Image, click Upload or pick an image from your Library, then add a label, for example
Before. -
Under After Image, add the second image and a label, for example
After. -
Under Options, set the orientation and the starting position of the slider.
-
Click Save draft or Publish.
Before/After settings you can change
- Before image and After image: upload or pick from your Library, each with its own label.
- Orientation: a horizontal slider that moves left and right, or a vertical one that moves up and down.
- Initial slider position: where the slider starts, for example 50%.
- Corner radius: how round the image corners are.
- Show labels: turn the Before and After labels on or off.
How to prepare images for a Shopify blog post
Good images make a blog post look professional and load fast. These simple rules help every image element look its best:
- Use the right size. An image about 2000 pixels wide looks sharp on large screens. Larger files only slow the page down.
- Compress your images. Keep most images under 500 KB. WebP files are usually smaller than JPG at the same quality.
- Name your files clearly. A file called
boho-wedding-guest-bag.webptells search engines more thanIMG_4821.jpg. - Keep the same style. Images with the same light, background and aspect ratio make a post look planned.
- Check on mobile. Side-by-side layouts stack on phones, so check every post with the phone icon above the canvas before you publish.
How images help your blog posts rank in search
Images help SEO when search engines can understand them. Alt text, clear file names and the words around an image tell Google what the image shows, so it can appear in image search and support the topic of your post.
Write alt text for every image. Describe what the image shows in a short, natural sentence, like “Embroidered boho clutch with pink tassels on a white table.” Alt text also helps readers who use screen readers.
Put the important text in the text, not in the image. Search engines and AI tools read the text of your post, so words that only appear inside a picture or a slide can’t help the post rank or be quoted in an AI answer.
Keep the page fast. Large images slow the page down, and slow pages rank lower and lose readers. Compress your images and use galleries and sliders only when they add something to the post.
FAQ
Can I add an image with text section to a Shopify blog post?
Yes. Shopify’s “Image with text” theme section works on pages and the home page, but in a blog post template it shows the same content on every article. To add a different image with text section inside each blog post, use the Text & Image element in vevy. It’s on every plan.
How do I put an image next to text in a Shopify blog post?
To put an image next to text, drag the Text & Image element into your post, upload the image and write your text. Set Image position to Left or Right to choose the side.
Can I add an image gallery to a Shopify blog post without an app?
Shopify’s built-in blog editor has no gallery, slider or before and after element. Without an app, you have to write the HTML and CSS for each layout yourself and paste it into the article.
What’s the difference between a gallery and a slider?
A gallery shows all the images at once in a grid. A slider shows one image at a time, and each slide can have its own title and button. Use a gallery when readers should compare images, and a slider when each image has its own message.
Which plan do I need for these image elements?
Text & Image and Before/After are on every plan, including Free. Gallery, Slider and Banner are in the Media & Marketing group, which needs the Starter plan ($7/month) or the Pro plan ($39/month).
Which image formats can I use?
Every image element accepts JPG, PNG, GIF, WebP and SVG files.
Can I link a slider or a banner to a collection?
Yes. Put the collection’s address in Button URL, for example /collections/summer-bags. Readers who click the button go straight to that collection.
Can I create images with AI in vevy?
Yes, on the Pro plan. You can generate a cover image and an image inside the Image element with AI. See AI tools inside the editor.